API Guides
When to use Smartcat API
Smartcat's simple, powerful, convenient, and secure API (Application Programming Interface) provides programmatic access to the Smartcat features from third-party applications. It is designed to operate as a full-fledged equivalent and even an extension to the Smartcat user interface. Such fundamental processes as the automatic creation of translation projects, status tracking, the download of the translated texts, etc. are easily completed using Create, Retrieve, Update, and Delete methods.
To use this document, you should have a basic familiarity with software development and the Smartcat user interface.
Any functionality described in this guide is available if you are logged in to a company account. You will not be able to use API from a freelancer account.
Authorization and authentication
As any other set of credentials, API credentials consist of a username and a password. To obtain them, log in to your Smartcat account as an Administrator and nagivate to Settings > API.
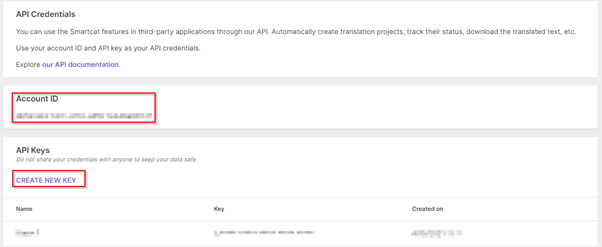
Your username is the string displayed in Account ID field.
Your password is an API key generated by clicking CREATE NEW KEY in the API Keys pane. Note that you can create multiple keys, if required.
The Smartcat API uses the primary Basic Authentication scheme for every method. Each request must be prefixed with the Authorization: Key header, where Key is a Base64 encoded "userName":"password" string.
Rate limits
All Smartcat API methods have a rate limit of 4 requests per second.
API call basics
The API allows you to access the resources and methods available in the system directly. This approach uses the standard Web methods, such as GET, PUT, POST, and DELETE, to retrieve, create, update and delete from the different Smartcat objects needed.
In general, the resources are accessible using the following format:
https://smartcat.domain/api/integration/v1/resource
Where:
smartcat domainis the URL of the corresponding Smartcat server:- for the European server, use
https://smartcat.ai/ - for the American server, use
https://us.smartcat.ai/ - for the Asian server, use
https://ea.smartcat.ai/
- for the European server, use
resourceis the name of a Smartcat object
For example, the full URL for a project list request will look as follows:
https://smartcat.ai/api/integration/v1/project/list
Methods
API methods represent specific operations, also referred to as API calls, that you can invoke to perform tasks, for example:
- Add, update, and delete objects
- Obtain data from your account
Smartcat performs validation on the data submitted within each API call before committing changes to your account data.
POST (Create)
The POST method is used to add new objects to your account.
GET (Retrieve)
This method allows you to retrieve or search data in your account. You can specify a single object ID or a list of IDs to retrieve an array of objects.
PUT (Update)
The PUT method updates objects in your account using the information submitted within the request.
DELETE
The DELETE method accepts an object type and ID and is used to purge objects from your account.
Multipart requests
Plain JSON request with two files
curl --request POST \
  --url https://smartcat.domain/api/integration/v1/project/create \
  --header 'Authorization: Basic YOUR_AUTHORIZATION_HEADER' \
  --header 'Content-Type: multipart/form-data' \
  --form '=@C:Path\To\File\Translate_0.txt' \
  --form '=@C:Path\To\File\Translate_1.txt' \
  --form '={  "name": "My Awesome Project",  "sourceLanguage":"en",  "targetLanguages":["ru"],  "assignToVendor":false}'
Request as file
curl --request POST \
  --url https://smartcat.domain/api/integration/v1/project/create \
  --header 'Authorization: Basic YOUR_AUTHORIZATION_HEADER' \
  --header 'Content-Type: multipart/form-data' \
  --form '=@C:Path\To\File\Translate_0.txt' \
  --form '=@C:Path\To\File\Translate_1.txt' \
  --form '=@C:Path\To\File\Request.json' \
Request.jsoncontent
[
  {
    "name": " My Awesome Project",
    "sourceLanguage": "en",
    "targetLanguages": ["ru"],
    "assignToVendor": false
  }
]
Some of our endpoints accept multipart/form-data payloads. These are primarily designed for handling file uploads. Here's how to properly structure such requests:
- Each file should be included as a separate form parameter.
- You must include one additional form parameter that carries the request body. This can either be:
- A plain JSON object embedded directly in the request, or
- A separate JSON file containing the request body. If you use a file, it must have a
.jsonextension.
To execute the POST /api/integration/v1/project/create endpoint, you can send a multipart request as shown in the right section.
Note: Make sure all file paths are valid and accessible to the tool you're using (e.g., curl).
Also, make sure that:
- The
Authorizationheader contains a valid value. - The
Content-Typeis correctly set tomultipart/form-data. - The JSON payload follows the structure required by the endpoint.
Response codes and error messages
The REST API responds to each request with an HTTP status code that indicates success or error.
The table below provides details of status codes, typical scenarios, and what information can be expected in the response body.
| HTTP status code | Description |
|---|---|
| 200 OK | This general response code indicates that the request was accepted and the response contains result. For GET requests, it means that the response body contains the quested resource or data. For PUT requests, it means that the operation has completed successfully, and the response body contains information about the result. |
| 202 IN PROGRESS | The request has been accepted for processing, but the processing has not been completed. This is usually received for asynchronous operations. |
| 204 OK | The operation has completed successfully, but there is no additional information to send in the response body. This code is usually received for DELETE requests. |
| 400 BAD REQUEST | Some aspect of the request was not valid. The response body contains information about the request and includes an error message. |
| 403 FORBIDDEN | Indicates that the user does not have sufficient permissions to access the requested resource. An attempt to access a resource that does not belong to the specified entity may also result in this error. |
| 404 NOT FOUND | The target resource does not exist. This might happen because the URI is invalid, or the resource has been deleted. |
| 409 CONFLICT | A conflicting change has been detected during an attempt to modify a resource. The response body provides further information. |
| 429 TOO MANY REQUESTS | The rate limit of 4 requests per second has been exceeded. |
| 422 CANNOT PROCESS | The content type of the request entity and the syntax of the request entity are valid and correct, but the server was unable to process the contained instructions. |
Creating a project
Using Plain JSON
curl --request POST \
  --url https://smartcat.domain/api/integration/v1/project/create \
  --header 'Authorization: Basic YOUR_AUTHORIZATION_HEADER' \
  --header 'Content-Type: multipart/form-data' \
  --form '=@C:Path\To\File\Translate_0.txt' \
  --form '=@C:Path\To\File\Translate_1.txt' \
  --form '={  "name": "My Awesome Project",  "sourceLanguage":"en",  "targetLanguages":["ru"],  "assignToVendor":false}'
Using a Request File
curl --request POST \
  --url https://smartcat.domain/api/integration/v1/project/create \
  --header 'Authorization: Basic YOUR_AUTHORIZATION_HEADER' \
  --header 'Content-Type: multipart/form-data' \
  --form '=@C:Path\To\File\Translate_0.txt' \
  --form '=@C:Path\To\File\Translate_1.txt' \
  --form '=@C:Path\To\File\Request.json' \
The
Request.jsonfile should have the following structure:
[
  {
    "name": " API Project",
    "sourceLanguage": "en",
    "targetLanguages": ["ru"],
    "assignToVendor": false
  }
]
In Smartcat, a project is the entity where you store files, define source and target languages (yes, we support multilingual projects), set deadlines, attach linguistic assets, and connect machine translation.
For starters, let's create a project that contains the most basic data: the name and source/target languages. There are many more parameters you can experiment with later, so your first project created through the API will have only the fundamental ones.
The method required to create a project is POST project/create method. Keep in mind that the parameter assignToVendor must be passed to request the method successfully.
You can either create a project and upload files at the same time, or upload files later. To perform this operation, send a POST request with the Content-Type: multipart/form-data header. Each file should be included as a separate form part. One additional part must contain the request body in JSON format — either as a plain JSON object or as an attached .json file. See Multipart Requests section for more details.
In the right section you can see examples of the request with plain json and json file.
Translation Process
You don’t need to explicitly trigger or complete the translation process to download results. Once a project is created and files are uploaded, the next steps are:
However, if you want to manually mark the project as completed, you can call the POST /api/integration/v1/project/complete endpoint.
Working with Documents
This section covers how to upload new documents, update existing ones, and delete previously uploaded documents from a project.
Importing Documents
Single File Upload
curl --request POST \
  --url 'https://smartcat.domain/api/integration/v1/project/document?projectId=PROJECT_ID' \
  --header 'Authorization: Basic YOUR_AUTHORIZATION_HEADER' \
  --header 'Content-Type: multipart/form-data' \
  --form '=@C:\Path\To\File\Translate_2.txt' \
  --form '=[{}]'
Batch File Upload
curl --request POST \
  --url 'https://smartcat.domain/api/integration/v1/project/document?projectId=PROJECT_ID' \
  --header 'Authorization: Basic YOUR_AUTHORIZATION_HEADER' \
  --header 'Content-Type: multipart/form-data' \
  --form '=@C:\Path\To\File\Translate_3.txt' \
  --form '=@C:\Path\To\File\Translate_4.txt' \
  --form '=[{},{}]'
To upload documents to a project, use the POST /api/integration/v1/project/document?projectId={YOUR_PROJECT_ID} endpoint. This uses the same multipart/form-data approach as project creation. Each file should be accompanied by a corresponding JSON object describing the file. If no specific configuration is needed, the object can be left empty.
You must provide one JSON object per file in the request array. This ensures each file is correctly associated with its parameters.
If you want to upload multiple files, include multiple form parts for the files and a corresponding JSON object for each file in the array (see examples in the right section).
Updating a Document
Update Document Request
curl --request PUT \
  --url 'https://smartcat.domain/api/integration/v1/document/update?documentId={documentId_languageId}' \
  --header 'Authorization: Basic YOUR_AUTHORIZATION_HEADER' \
  --header 'Content-Type: multipart/form-data' \
  --form '=@C:\Path\To\File\Translate_0_v2.txt' \
  --form '={}'
In continuous localization workflows, it's common to update a document with a new version. You can do this using the PUT /api/integration/v1/document/update?documentId={documentId_languageId} endpoint.
This method overwrites the existing document in Smartcat. Any previously completed translations will be preserved and inserted into the updated file through pretranslation.
Note:
The documentId can be obtained from the GET /api/integration/v1/project/{project_id} endpoint.
You can also determine document id by concatenating the document ID with the target language ID using an underscore (_).
Example:
If the documentId is abc and the target language is English (9), use abc_9 as the value for the documentId parameter.
Deleting a Document
Delete Document Request
curl --request DELETE \
  --url 'https://smartcat.domain/api/integration/v1/document?documentIds=abc_9}' \
  --header 'Authorization: Basic {YOUR_AUTHORIZATION_KEY}' \
Delete Many Documents
curl --request DELETE \
  --url 'https://smartcat.domain/api/integration/v1/document?documentIds=a01_9,a02_9}' \
  --header 'Authorization: Basic {YOUR_AUTHORIZATION_KEY}' \
To delete one or more documents, use the DELETE /api/integration/v1/document endpoint. You can pass a single documentId or a comma-separated list of IDs.
Examples:
- To delete the document with ID
abcfor target language9, usedocumentIds=abc_9. - To delete multiple documents:
a01for language9a02for language9
Use:documentIds=a01_9,a02_9
Ensure that all documentIds follow the same format: <documentId>_<targetLanguageId>.
Custom Document Segmentation (Experimental Feature)
Supported Formats List
curl --request GET \
  --url https://smartcat.domain/api/integration/v1/directory/formats \
  --header 'Authorization: Basic {YOUR_AUTHORIZATION_HEADER}' \
  --header 'Content-Type: application/json' \
Our API provides advanced options for customizing how documents are segmented during import. However, this functionality is currently under active development. As such, the available parameters and their names are subject to frequent changes.
If you still wish to explore this feature, please first verify whether your desired file format is supported by calling:
GET /api/integration/v1/directory/formats
If the format you're interested in is supported, please contact our support team. We will provide you with the necessary configuration parameters and guidance tailored to your specific use case.
⚠️ This feature is experimental and may change without notice. Proceed with caution and consult support when in doubt.
Extended Project Configuration
Previously, we covered how to create a project and upload documents. However, the API also supports more advanced project configuration — such as setting up machine translation engines, attaching custom glossaries, and managing translation memories. This section walks you through each of these options.
Machine Translation Engine
Available MT Engines List
curl --request GET \
  --url https://smartcat.domain/api/integration/v1/project/{project_id}/mt/available \
  --header 'Authorization: Basic {YOUR_AUTHORIZATION_KEY}' \
Available MT Engines List Response
[
  {
    "Id": "engine:Amazon",
    "Name": "Amazon Translate",
    "Languages": ["ru"]
  },
  {
    "Id": "engine:Google",
    "Name": "Google",
    "Languages": ["ru"]
  }
]
Set MT Engine For a Project
curl --request POST \
  --url https://smartcat.domain/api/integration/v1/project/{project_id}/mt \
  --header 'Authorization: Basic {YOUR_AUTHORIZATION_KEY}' \
  --header 'Content-Type: application/json' \
  --data '[
    {
        "id": "engine:Google",
        "languages": [
            "ru"
        ]
    }
]'
You can list available MT engines for a specific project using:
GET /api/integration/v1/project/{project_id}/mt/available
This will return a list of supported engines and the languages they can be used with.
To configure a machine translation engine for a project, you can:
- Set it during project creation, or
- Call
POST /api/integration/v1/project/{project_id}/mtdirectly.
You may assign different MT engines for different languages to fine-tune translation quality.
To check the current MT configuration for a project, use:
GET /api/integration/v1/project/{project_id}/mt
Translation Memories
List of Available Translation Memories
curl --request GET \
  --url 'https://smartcat.domain/api/integration/v1/translationmemory?batchSize=1' \
  --header 'Authorization: Basic {YOUR_AUTHORIZATION_KEY}' \
List of Translation Memories Plugged to the Project
curl --request GET \
  --url https://smartcat.domain/api/integration/v1/project/{project_id}/translationmemories \
  --header 'Authorization: Basic {YOUR_AUTHORIZATION_KEY}' \
Recreate Translation Memories for the Project
curl --request POST \
  --url https://smartcat.domain/api/integration/v1/project/{project_id}/translationmemories \
  --header 'Authorization: Basic {YOUR_AUTHORIZATION_KEY}' \
  --header 'Content-Type: application/json' \
  --data '[
    {
        "id":"{TRANSLATION_MEMORY_ID}",
        "matchThreshold":90,
        "isWritable":true
    }
]'
You can view available translation memories linked to your account using:
GET /api/integration/v1/translationmemory?batchSize={AMOUNT}
To see which TMs are currently attached to a project, use:
GET /api/integration/v1/project/{project_id}/translationmemories
To update the list of translation memories for a project, use:
POST /api/integration/v1/project/{project_id}/translationmemories
Important Notes:
- This request will replace the entire list of translation memories linked to the project.
- If you want to add a new TM, you must also include all currently attached TMs in the request.
- Only one memory can have
"isWritable": true.
Glossaries
List of All Available Glossaries
curl --request GET \
  --url https://smartcat.domain/api/integration/v1/glossaries \
  --header 'Authorization: Basic {YOUR_AUTHORIZATION_KEY}'
Response with List of All Glossaires
[
  {
    "id": "uuid",
    "name": "Default glossary (auto-generated)",
    "languages": ["ru", "en"],
    "units": 999,
    "unitsPending": 0,
    "isDefault": true
  },
  {
    "id": "uuid",
    "name": "Eng-Ru",
    "description": "Offencive Words",
    "languages": ["en", "ru"],
    "units": 9999,
    "unitsPending": 0,
    "isDefault": false
  }
]
Set Glossaires for the Project
curl --request PUT \
  --url https://smartcat.domain/api/integration/v1/project/{project_id}/glossaries \
  --header 'Authorization: Basic {YOUR_AUTHORIZATION_KEY}' \
  --header 'Content-Type: application/json' \
  --data '[
    "glossary_id"
]'
Glossary configuration works similarly to translation memories.
To retrieve all available glossaries:
GET /api/integration/v1/glossaries
Select the ones you'd like to use, then assign them to a project with:
PUT /api/integration/v1/project/{project_id}/glossaries
Note: This will overwrite all previously attached glossaries for the project.
Deadline
Update project with deadline
curl --request PUT \
  --url https://smartcat.stage-live.sc.local/api/integration/v1/project/{PROJECT_ID} \
  --header 'Authorization: Basic {YOUR_AUTHORIZATION_HEADER}' \
  --header 'Content-Type: application/json' \
  --data '{
    "name":"My Awesome Project",
    "deadline":"2028-08-24T14:15:22Z"
}'
Project deadlines can be defined in two ways:
- During project creation by including the
deadlineparameter. - By updating the project after creation using:
PUT /api/integration/v1/project/{project_id}
Caution: Updating a project via this method will overwrite any parameters you include, so be sure to supply all values you wish to retain.
Each of these configuration options enables you to tailor your project setup for better translation quality and streamlined workflows.
Project Tasks Management
This section covers how to assign users to tasks and set deadlines using the Smartcat API.
Assigning Users to Tasks
Search Team
curl --request POST \
  --url https://smartcat.domain/api/integration/v1/account/searchMyTeam \
  --header 'Authorization: Basic {YOUR_AUTHORIZATION_HEADER}' \
  --header 'Content-Type: application/json' \
  --data '{
    "skip": 0,
    "limit":100
}'
Search Team response example
[
  {
    "id": "f1cb2b49-23a0-41cb-8e66-7aa3345c009e", //use this id in the following request
    "email": "t.john@your-domain.com",
    "firstName": "Translator",
    "lastName": "John",
    "services": []
  }
]
Find Tasks
curl --request GET \
  --url 'https://smartcat.domain/api/integration/v1/projectTask/{PROJECT_ID}/list?currency=eur' \
  --header 'Authorization: Basic {YOUR_AUTHORIZATION_HEADER}' \
Find Tasks response example
[
  {
    "id": "uuid",
    "number": "TR-1",
    "status": "created",
    "progressPercentage": 0.0,
    "sourceLanguage": "en",
    "targetLanguage": "ru",
    "stageType": "translation",
    "stageId": "uuid",
    "documentIds": ["abc"],
    "createDate": "2030-07-15T10:45:10.785Z",
    "lastUpdateScopeDate": "2030-07-15T10:45:11.755Z",
    "individualAssignments": [],
    "vendorAssignments": [],
    "invitationStrategyType": "rocket"
  }
]
Assign user request
curl --request PUT \
  --url https://smartcat.domain/api/integration/v1/projectTask/{PROJECT_ID}/{TASK_ID}/individual-assignment \
  --header 'Authorization: Basic {YOUR_AUTHORIZATION_HEADER}' \
  --header 'Content-Type: application/json' \
  --data '{
    "shouldAssignInShortlistStatus":false,
    "userIds":[
        "f1cb2b49-23a0-41cb-8e66-7aa3345c009e"
    ]
}'
You can assign both internal users and vendors to project tasks using the API. The process involves the following steps:
1. Search for Team Members
Use the following endpoint to retrieve users from your team:
POST /api/integration/v1/account/searchMyTeam
This will return a list of users with their IDs, which you’ll need for task assignment.
2. Retrieve Project Tasks
To list all tasks for a specific project, call:
GET /api/integration/v1/projectTask/{PROJECT_ID}/list?currency=eur
Each task in the response will include a unique taskId you can use for assignment.
3. Assign a User to a Task
Once you have the userId and taskId, use the following endpoint to assign the user:
PUT /api/integration/v1/projectTask/{PROJECT_ID}/{TASK_ID}/individual-assignment
Pass the userId inside the JSON body. You may assign multiple users at once by including multiple IDs in the userIds array.
Setting Task Deadlines
Set deadline request
curl --request PUT \
  --url 'https://smartcat.domain/api/integration/v1/projectTask/{PROJECT_ID}/{TASK_ID}/deadline?deadline={DEADLINE_DATE_TIME}' \
  --header 'Authorization: Basic {YOUR_AUTHORIZATION_HEADER}' \
  --header 'Content-Type: application/json'
}'
set a deadline for a specific task, use:
PUT /api/integration/v1/projectTask/{PROJECT_ID}/{TASK_ID}/deadline?deadline={DEADLINE_DATE_TIME}
This lets you specify an exact ISO 8601 timestamp for the task deadline.
Ensure the timestamp is in UTC format (e.g., "2030-07-15T10:45:10.785Z").
This functionality gives you fine-grained control over task assignment and scheduling, which is essential for managing large translation projects efficiently.
Calculating statistics
In some cases, you will need to calculate how many words your document has and how many of them are translation memory matches. To do this, use the following method:
GET project/{projectId}/statistics?onlyExactMatches=false
Note that the statistics will be calculated for all documents in the project. If you need statistics for a specific document, use
GET document/statistics?documentId={documentId_languageId}&onlyExactMatches=false
If you only need the overall word count without translation memory matches, simply use the wordsCount parameter returned by the GET document?documentId={documentId_languageId} method.
Tracking translation status
You can fetch information about your document at any time: progress for each workflow stage, task status, assignments, and so on. To get this information for a specific document, use GET document with the corresponding document ID:
GET document/statistics?documentId={documentId_languageId}&onlyExactMatches=false
To fetch information about the progress and statuses of all your documents with the overall project status and progress into the bargain, use GET project/{projectid} with the corresponding project ID.
Exporting a translation
To export a translated document, use a POST document/export request:
document/export?documentIds={documentId_languageId}&type=target&stageNumber=1
This requests Smartcat to render the final document. For smaller documents, you’ll receive the task ID in the response. For larger ones, rendering the target file will take some time depending on the document size and server load. In this case, Smartcat will send you a callback with the task ID to <callbackURL>/document/exportRequestCompleted once the exported document is ready.
NOTE:
The stageNumber parameter defines a number of a stage in your project workflow. For example, 1 is for Translation if it is the first stage, 2 is for Editing, and so on.
Integrating with a permanent Smartcat project
In order to streamline your integration with Smartcat by API you can use permanent projects for importing and exporting documents from them.
This is particularly handy when a specific source language, a static set of target languages and documents of the same type are going to be processed with the same settings all the time.
To implement that type of integration, you have to manually create a Smartcat project, and then upload documents, track their status and export the translation through the API.
The following sections describe each of these steps in detail.
Create a permanent project for the API integration
To create a permanent project, proceed as follows:
Log in to to your Smartcat account.
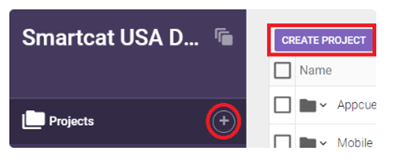
To start the project creation process, click the Plus (+) button next to Projects in the left menu bar or the Create Project button in the workspace.
Click Skip when prompted to upload documents.
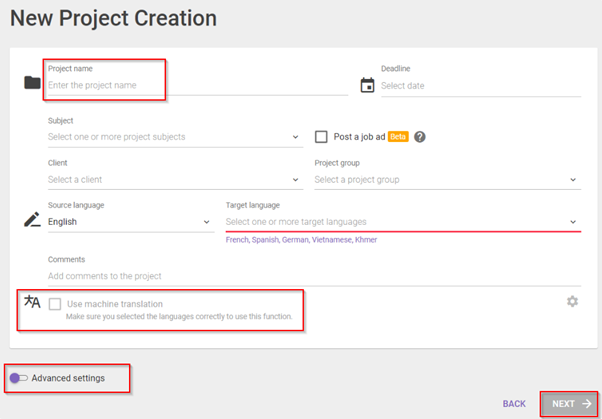
Enter the project name and select the source language and target languages of the project. Please note that after you create a project, you can add translation languages, but cannot change or remove any languages you have already chosen.
To enable machine translation for a project, check the Use machine translation box. If you choose to use machine translation, by clicking on the Settings wheel, you will have an option to choose one of the many engines that are integrated with Smartcat. This option is rather flexible and allows users to assign different engines to each language in order to benefit from the best possible MT output.
To set up translation memories, glossaries and quality assurance checks, use the Advanced Settings switch.
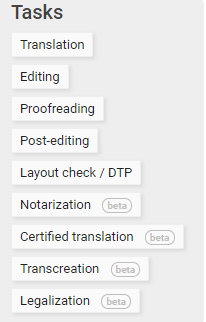
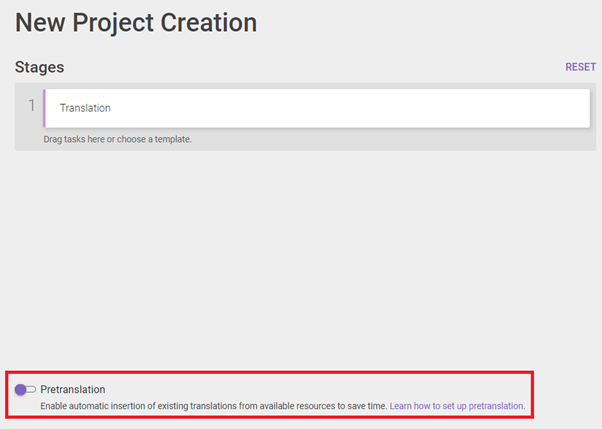
Select the workflow stages for your project.
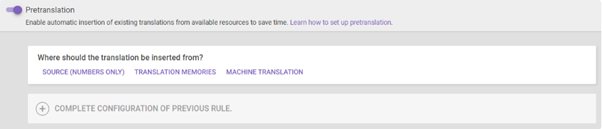
Add the pretranslation rules of your preference.
Click Finish. Your project has been successfully created.
You can find more details on Smartcat projects here.
Collect the Project ID
To configure the integration, you will require the Smartcat project ID. This is the unique identifier assigned automatically when a project is created in Smartcat. It consists of 36 characters (including hyphens).
To collect the Project ID, open the project page and copy the part of the address line after /project/:

Prepare the API credentials
To prepare the API credentials, refer to the Authorization and authentication section
Upload a document for translation
To import a file into an existing project, use the POST project/document method.
[
    {
        "key": "file",
        "type": "file",
        "src": "/D:/projects/smartcat/temp/test.txt"
    },
    {
        "key": "documentModel",
        "value": "[
            {
              "externalId": "1232456789",
              "metaInfo": "",
              "disassembleAlgorithmName": "",
              "presetDisassembleAlgorithm": "",
              "bilingualFileImportSetings": {
                "targetSubstitutionMode": "all",
                "lockMode": "none",
                "confirmMode": "none"
              },
              "targetLanguages": [
                "ru"
              ],
              "enablePlaceholders": true,
              "enableOcr": true
            }
        ]",
        "contentType": "application/json",
        "type": "text"
    }
]
Update a document
If you have a newer document version (which is quite usual for a continuous scenario), you can update it in your project using the PUT document/update method and the document ID. The corresponding document will be overwritten in Smartcat. All translations that have already been done will be inserted in the new document through pretranslation.
[
    {
        "key": "file",
        "type": "file",
        "src": "/D:/projects/smartcat/temp/test.txt"
    },
    {
        "key": "updateDocumentModel",
        "value": "{
            "bilingualFileImportSetings": {
                "targetSubstitutionMode": "all",
                "lockMode": "none",
                "confirmMode": "none"
            },
            "enablePlaceholders": true
        }",
        "contentType": "application/json",
        "type": "text"
    }
]
Track the document status
You can fetch information about your document at any time: progress for each workflow stage, task status, assignments, and so on. To retrieve this information for a specific document, use GET document with the corresponding document ID.
To retrieve information about the progress and statuses of all your documents at once and the overall project status and progress, use GET project/{projectid} with the corresponding project ID.
Export the translation
To export a translated document, use a POST document/export request. This instructs Smartcat to render the final document. For smaller documents, you will receive the task ID in the response. For larger ones, rendering the target file will take some time depending on the document size and server load. In this case, Smartcat will send you a callback with the task ID to <callbackURL>/document/exportRequestCompleted once the exported document is ready.
https://smartcat.com/api/integration/v1/document/export?documentIds=f1e5e09a8ad7830434cc477d_25&documentIds=de0b3b432ad7837175dcfeb3_25&mode=current&type=source&stageNumber=1
The stageNumber parameter defines the stage index in your project workflow. For example, 1 is for Translation if it is the first stage, 2 is for Editing, and so on.
Integrating with a temporary Smartcat project
The most common way of API integration with Smartcat is by using a permanent project.
However, temporary projects can also be used for integration in the following cases:
- You have a dynamically changing list of source and target languages
- Your projects are of very different nature and have different settings, that is pretranslation rules, stages, assignees and so on
- You are using an external system that is unable to work in continuous mode and expects the translation system project lifecycle to be internally managed.
The downside of this approach is that there are certain project settings, such as MT engine mapping or advanced pretranslation rules, that cannot be set up via API.
As usual, prior to using API you need to generate a set of API credentials and choose the appropriate Smartcat domain.
The process typically involves the following steps:
Postman/Insomnia Requests Collection
This file contains a collection of requests for our integration API, covering the main usage scenarios. You can import it into Insomnia or Postman.
After that, you will need to define a few environment variables:
urlapiKeyuserId
Some requests use projectId, which you can either create using one of the requests in the collection or replace with an existing projectId.
Instant translations via the real-time API
If you need translations to be delivered instantly to your live application, you can use Smartcat real-time API. Just make a simple request with a piece of text you need to translate and get the translation in response.
To use the real-time translation API, do the following:
Go to your Smartcat account, open 'Settings/Smart translation profiles'.
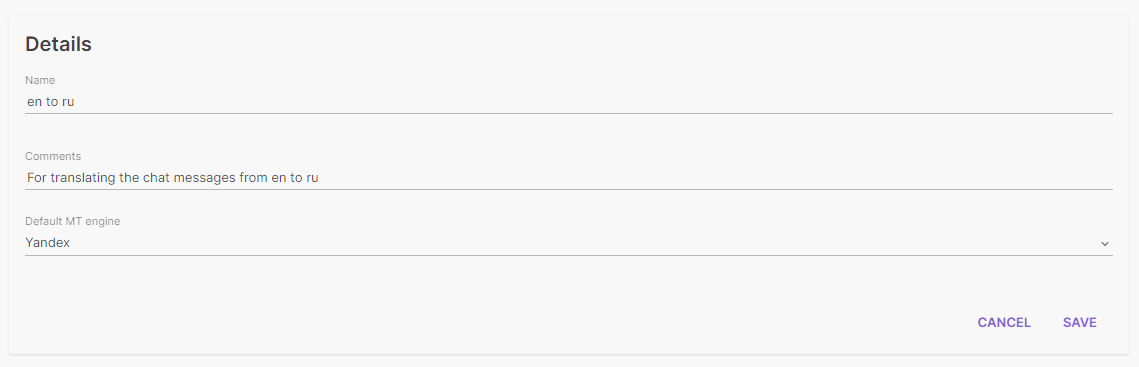
Click 'Add smart translation profile'. Enter the name, comments and select the MT engine that will be used for making translations. Hit 'Save'.
Click the Edit button on a newly created translation profile.
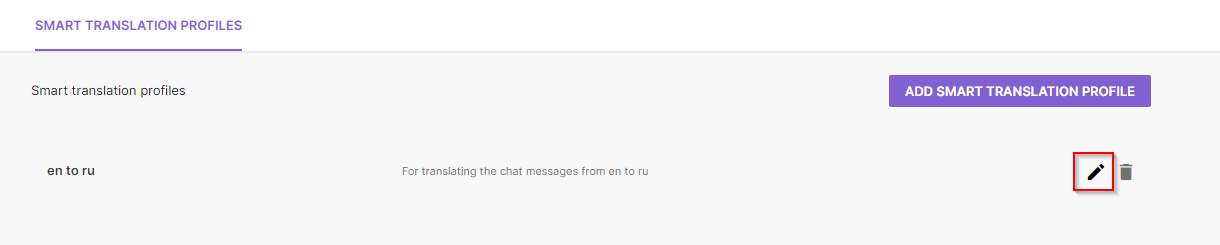
Copy the ID from the url.
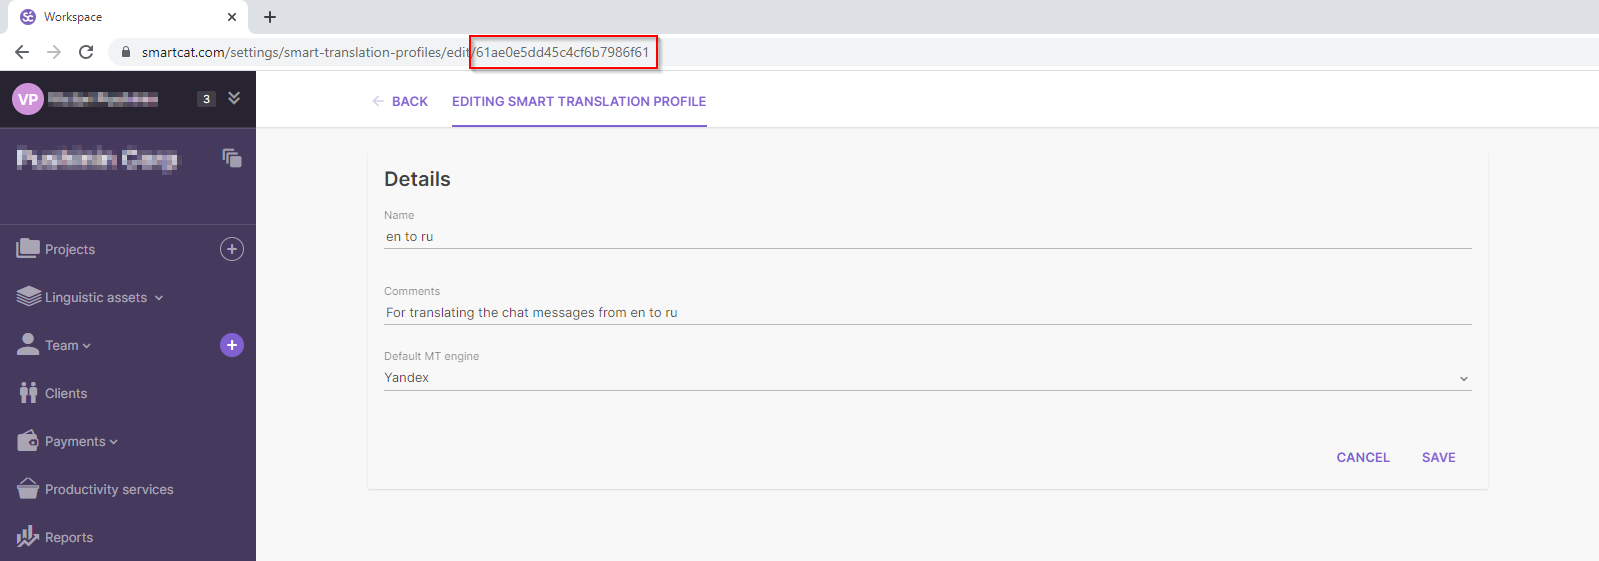
Use that ID in a request described here: Smart translation
As usual, prior to using the API you need to generate a set of API credentials and choose the appropriate Smartcat domain.
Notification callbacks
How to use callbacks to get notifications when the status of a document or project changes in Smartcat
You can use callbacks to get notifications when the status of a document or project changes in Smartcat, and to get the status of importing bilingual XLIFF versions of documents.
Configuration for receiving callbacks
In order to get notification callbacks, you need to follow these steps:
Configure the web server.
Configure the callback URL for WebAPI.
Configure notifications using the API methods described below.
Process the callback request when a project's status changes. URL:
<callbackURL>/project/statusProcess the callback request when a document's status changes. URL:
<callbackURL>/document/statusProcess the callback request to finish importing a translation from an XLIFF. URL:
<callbackURL>/document/translationImportCompleted
| Project status request structure: |
|---|
| POST /api/callback/project/status HTTP/1.1 |
| Host: example.local |
| Content-Type: application/json` |
| ["1e2d703f-9def-4d27-ab4d-350cbbe8c44b", "b5bf9123-31b3-4e45-9ee9-8c14d15a4145"] |
| Document status request structure: |
|---|
| POST /api/callback/document/status HTTP/1.1 |
| Host: example.local |
| Content-Type: application/json` |
| ["189_25", "310_25"] |
| Translation importing status request structure: |
|---|
| POST /api/callbackUrl/document/translationImportCompleted HTTP/1.1 |
| Host: example.local |
| Content-Type: application/json` |
| ["60606_25", "61234_25"] |
If some of the notifications from the queue were sent but some could not be delivered, the undelivered notifications are put in the retry queue.
Interval for resending notifications if Smartcat cannot access the callback URL: 30-second delay with 8 attempts; the delay doubles for each subsequent attempt.
Please see the API description for setting up the callbacks: API Callback
Note that you can use additionalHeaders parameter, which adds an HTTP header to the notifications. This HTTP header can be useful if the web server is behind a firewall and authentication is necessary. If this is not the case, you can ignore the additionalHeaders parameter.